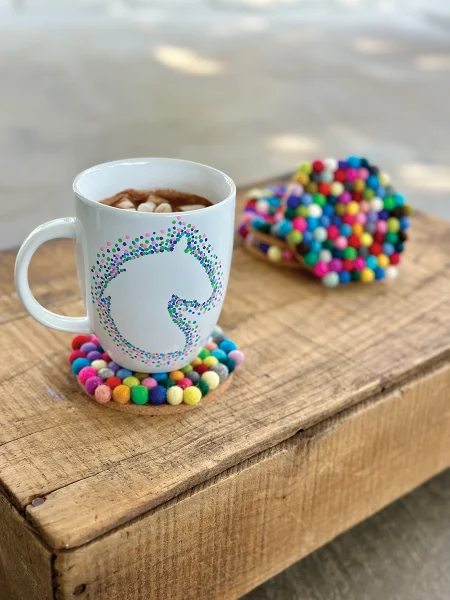
Beat the winter chill and warm up with your very own horsey mug! Need a place to set down your mug? You can make these super easy, adorable coasters. These two DIY winter projects are a sure way to start your year off right.
Coasters
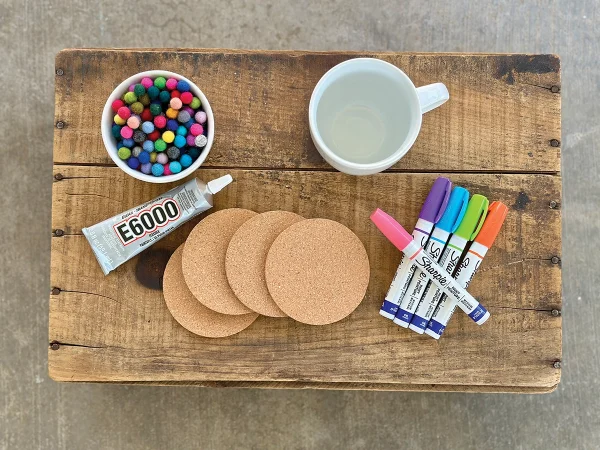
Materials Needed
◆ Cork coasters
◆ Wool felt puff balls (1 cm)
◆ E6000 glue
◆ Toothpick (optional)
Instructions
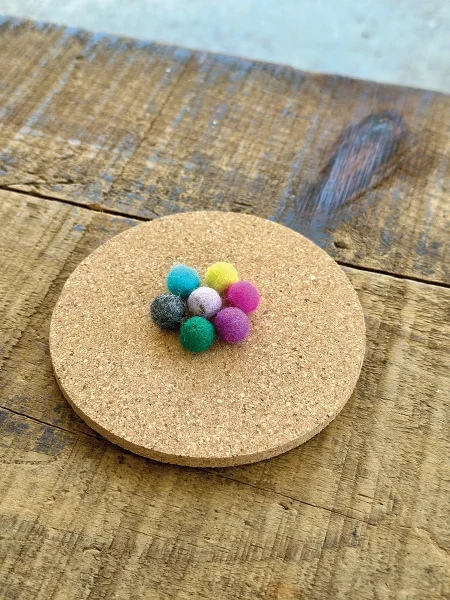
Step 1: Apply a small amount of glue to the center of your coaster.
Step 2: Place one wool puff ball in the center with a circle of puff balls around it.
Step 3: Hold in place for a minute, applying pressure to the wool balls so they are as close together as possible. Let sit and dry for a few hours before starting the next layer.
Step 4: Repeat steps 1-3 in small sections or layers until you have covered the entire coaster.
Tip: Use a toothpick to get glue in between layers of the wool balls to help them stick together.
Mug
Materials Needed

◆ Ceramic mug
◆ Rubbing alcohol
◆ Oil-based paint markers
◆ Picture of a horse
◆ Tape
Instructions
Step 1: Wipe down your mug with rubbing alcohol so the paint markers will stick.
Step 2: Print out a simple picture of a horse or whatever design you want on your mug.
Step 3: Cut out your design and tape it onto the mug, making sure to only put tape on the back, not the sides.
Step 4: Using oil-based paint markers, make an outline of dots around your design. We used multiple colors, but you can also do this with only one color.
Step 4: Continue adding dots around your design, leaving more and more space the further you get away from your design to achieve the desired effect.
Step 5: Once you are happy with your mug, remove your taped-on design.
Tip: If any dots got under your design, you can use a cotton swab and rubbing alcohol to remove it.
Step 6: Let your mug dry for 48 hours.
Step 7: With an adult’s help, place your mug in a cold oven and set to 250° F. Bake for 2 hours, then turn the oven off. Once cool, remove your mug.
Step 8: Enjoy your super cute mug! Make sure to hand-wash only to preserve your design.
These DIY winter projects appeared in the January/February 2025 issue of Young Rider magazine. Click here to subscribe!

