Pole bending is a great sport to try, whether you want to compete or just have fun! It improves your horsemanship skills and gives your horse a task to do.
Sometimes pole bending can seem complicated because there are so many poles to quickly maneuver around, but the most important advice is to keep it simple. The following are some tips to keep pole bending simple so that it doesn’t feel as though you are ducking and diving through a forest of trees.
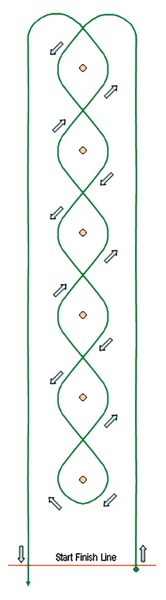
Parts of the Pole Bending Pattern
When training a horse for pole bending, one important concept is to maintain consistency. Basically, do the same thing in the same way so that your horse begins to build confidence in what he is doing.
There are certain points to hit on the pattern that will build you and your horse’s confidence and help you to stay accurate as you get faster. The four main parts of the pole bending pattern are the run down, the end poles, the weave, and the run home.
When training your horse, start at the walk, then trot, and then progress to the canter over time. If you go too quickly, you might end up hitting poles or losing control on the pattern, which can lead to bad habits in your horse.
As you become more advanced, you can adjust the distance you travel from the poles to better suit your horse, but remember to remain consistent.
The Run Down
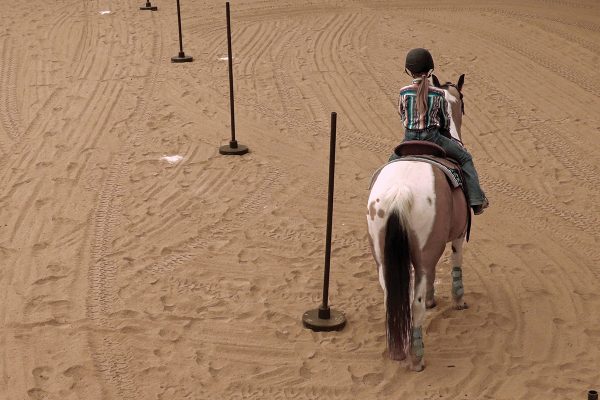
On the run down, it’s important to stay straight while moving parallel to the poles. I tend to stay about 4 to 6 feet away from the poles, depending on the horse I am riding. Some horses need a little more space to make the first turn.
As you approach the first turn, you should be sitting deep in the saddle to help balance your horse so that he can transition into the turn. If you are going down in the canter, make sure that you start on the correct lead to make the first turn. If you turn the first pole to the left, you would canter down on the left lead, and vice versa.
The End Poles
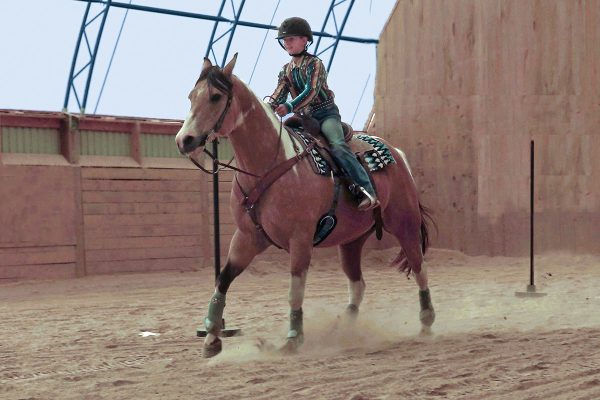
When turning around the end poles, being closer is not always faster. In fact, it can be slower, because your horse may have to pivot many times to get around the end pole without hitting it.
I travel over points between 3 to 4 feet away to keep the horse’s feet moving and powering around the end poles. When you are moving around an end pole, try to stay deeply seated in your saddle so you don’t lose your balance or lean in any direction.
Use your inside rein to gently guide your horse around the pole. As you get faster, you may want to use your outside hand to hold the saddle horn so that the speed of the turning horse doesn’t unseat you.
The Weave
Most of the pattern is spent in the weave. Keep in mind that the fastest way between two points is a straight line; in the weave, you want to aim to travel over points that are about 2 feet to the side of each pole.
A big mistake people make is looking at the poles instead of looking at the points they want to ride their horse over. An exercise that you can do is set up the pole bending pattern and have your horse stand 2 feet to the left of the first pole. Have your horse stopped where your body is in alignment with the pole. Look 2 feet to the right of the next pole, turn your horse, and then travel in a straight line to that point. Stop on that point so that your body is again beside the pole and then continue on, stopping at each pole. You can sprinkle some baby powder to mark the points that are 2 feet beside the poles.
To progress, start to trot over the points, and instead of stopping, sit heavy in the saddle at the points to balance your horse. As you pick up speed through the poles, the points will become places where your horse will balance himself and later do a flying lead change between the poles.
The Run Home
When you make the final turn to run home, look at a point on the fence ahead of you and run your horse straight toward it. To encourage your horse to go quickly home, put your hands slightly forward so that he feels a little freedom to move forward.
I try to stay in a straight line as close to the poles as possible. Once you have crossed the timer line, sit deep in the saddle and stop your horse straight. This trains him to not duck left or right, which can be dangerous.
There’s a lot of horsemanship work and training that goes into a pole bending horse. As you increase your speed with training, maintain that consistency by hitting the same points and looking at the points you want your horse to travel over.
I hope you have as much fun pole bending as I do, and best of luck to you and your horse!
This article about pole bending appeared in the January/February 2024 issue of Young Rider magazine. Click here to subscribe!

