Who’s ready to bake? We are! Whether you’re celebrating a birthday, a Friday, or just excited because it’s riding lesson day, these DIY horse-themed cupcakes are a fun twist on a classic treat.
Materials
◆ Boxed cake/cupcake mix
◆ Frosting
◆ Horse mold
◆ Melting wafers
◆ Parchment paper
◆ Angled icing spatula
◆ Plastic bag (optional)
Instructions
Step 1: Bake cupcakes (see Tip below) and let cool.
Tip: Bake your cupcakes at a lower temperature for a longer amount of time to create a flat top cupcake. We baked ours at 250° F for 40-45 minutes.
Step 2: While your cupcakes are cooling, you can create your horse chocolates. Melt your melting wafers per the directions. Pour the melted chocolate into your horse molds. Gently tap and wiggle to create an even top. Set aside for later.
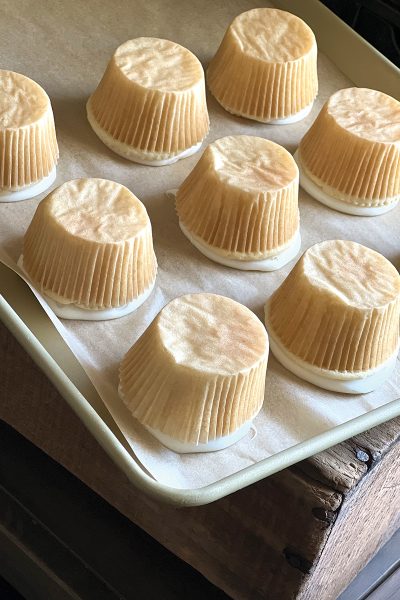
Step 3: Line a baking sheet with parchment paper. Once your cupcakes are cool, frost each one and place it upside down on the baking sheet, pressing lightly. Place in the freezer for about 10 minutes.
Tip: You can use a plastic zip-top bag to pipe your frosting by placing the frosting in the bag, cutting a hole in the corner, and squeezing (or piping!) the frosting onto each cupcake in a circular pattern. You can also use a knife to frost your cupcakes.
Step 4: Once your chocolates have cooled, gently remove them from the mold and set aside.
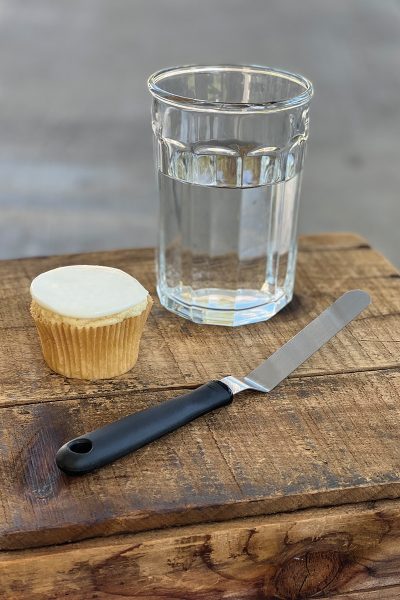
Step 5: Remove your cupcakes from the freezer and carefully remove them from the parchment paper. Fill up a cup with warm water. Dip your angled icing spatula in the warm water to warm it up. Use your spatula to carefully even out the icing, occasionally dipping it back in the water to keep it warm.
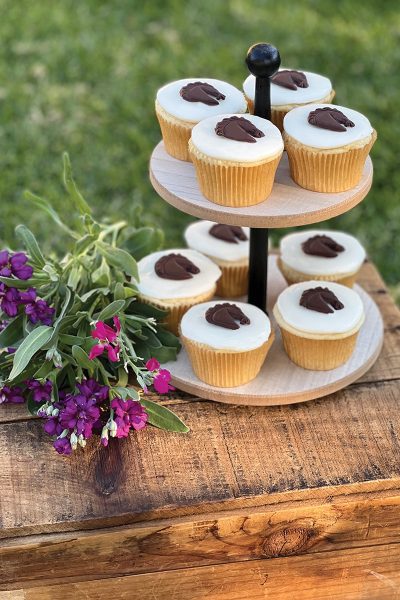
Step 6: Place a little bit of frosting on the back of each horse chocolate before placing in the middle of your flat-top cupcake.
Step 7: Share, eat and enjoy!
This article about DIY horse cupcakes appeared in the March/April 2023 issue of Young Rider magazine. Click here to subscribe!