Can you believe it’s already time to go back to school? With these super-easy DIY back-to-school horse projects, you’ll be on trend. All of them can be done in three simple steps with only three materials each! Now you can head back to school in style-horsey style, that is.
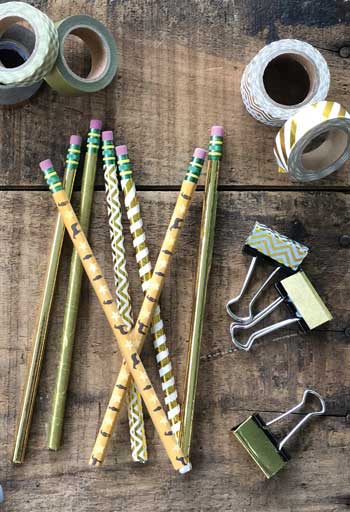
Pencils & Clips
Materials:
◆ Pencils
◆ Foldback clips
◆ Washi tape
Instructions
Step 1: Cut washi tape to the length you want.
Step 2: Wrap around the pencil or clip. For the pencil, you can wrap in a spiral or the length of the pencil.
TIP: You can make your own horse washi tape! Design your own washi tape with your favorite horse pictures, and print on a clear full-sheet label (we used Avery 18665). Cut it out and add it to your favorite pencils and notebooks.
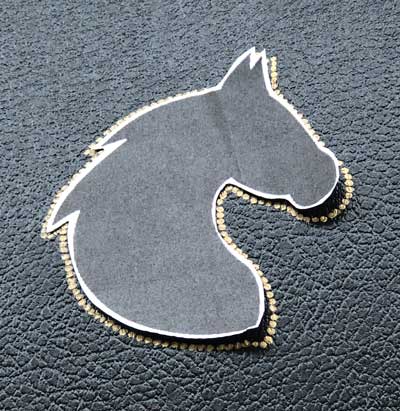
Horsey Notebook
Materials:
◆ Plain notebook
◆ Gold Sharpie
Instructions
Step 1: Print out a picture of a horse or horseshoe. Using a small piece of tape under the picture, place it on the center of your plain notebook.
Step 2: Using a gold Sharpie, place little dots around the edge of your picture.
Step 3: Continue to add dots, spacing them out a little bit as you go, until you get to the edge of the notebook.

Gold Shoes

Materials:
◆ Plain white shoes (we found ours at Hobby Lobby)
◆ Tulip Color Shot Instant Fabric Color in Gold Shimmer
◆ Horse charm
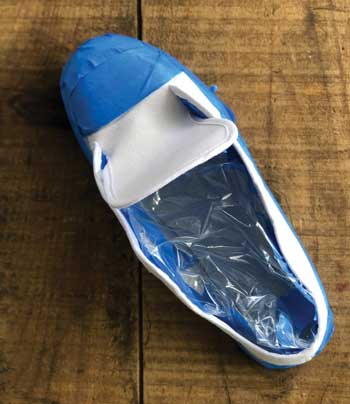
TIP: I would also recommend using some blue painter’s tape and plastic bags to cover the parts of the shoe you don’t want to be gold. (If you want the entire shoe to be gold, you won’t need these!)
Instructions
Step 1: Remove the laces and prepare the shoes to be painted (if you want to keep part of the shoe white, like we did, use blue painter’s tape and/or a plastic bag to cover it).
Step 2: With an adult’s help, follow the directions on your spray paint bottle and spray the shoes. We used Tulip fabric spray paint, which is amazing! You only have to wait five minutes between coats. Spray as many coats as needed to reach the color you want.
Step 3: Once dry, put the laces back on. Don’t forget to add a cute horsey charm!
This article on DIY back-to-school horse projects originally appeared in the September/October 2019 issue of Young Rider magazine. Click here to subscribe!