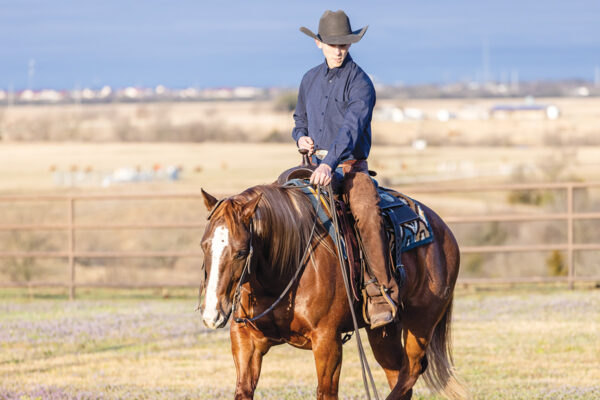
The most common type of reins used in western riding disciplines are split reins. These are made of two strips of leather around 7 to 8 feet long. They can be a challenge to learn how to use, but once you’ve got the hang of them, you’ll find them the most versatile choice for anything you’d like to do in a western saddle. Here, western trainer Ben Baldus explains how to use split reins in various ways, and how to improve your skills in using them.
Types of Reins
Split reins are the reins of choice for general western riding in many regions of the country. This is partly because they’re easy to use on and off the horse, and they’re safer while riding in brush.
“When you’re trail riding and you want to get off and open or close a gate, pick up some trash or do something off of your horse, leather split reins essentially give you 8 feet of lead to do whatever you need to do on the ground,” Ben says. “Your horse could be following you, loosely tied to a fence or a branch, or if he’s been taught, ground tied.”
Roping reins, which are made of a single piece of braided cord or leather that clips to the bit at each end, are ideal for speed events and roping, but they’re a safety hazard while on the ground if you don’t disconnect one end of the reins. Your horse could also hang a leg and have a wreck if he stepped through the loop.
Romal reins are two reins closed at the end with a “button” and a tail going down one side of the horse’s neck. They’re mainly used in reined cow horse events, and many West Coast riders prefer them. While great for using with a shanked bit like a curb, they’re not used with a snaffle bit. It can also can be challenging to adjust one rein or the other in length.
When riding in a snaffle, split reins are a good choice because you can use two hands and adjust them as needed.
Split reins are encouraged in most western judged events, from reining and cutting to pleasure, trail and horsemanship.
Using Split Reins
You’ll primarily use split reins two different ways: either two-handed or one-handed.
Two-handed: When using a snaffle bit, you’ll ride two-handed in the show pen and at home. You can ride a horse in a curb bit two-handed at home, but not in most show classes.
“My personal preference is to have the two reins cross [on] the horse’s neck, and I hold both reins in each hand, creating an arch across the center,” Ben says. “I can adjust my reins if I need to by sliding them together or apart to shorten or lengthen my reins.”
With your reins this way, if you drop one rein, it will simply fall on your horse’s neck where you can pick it up again. If your reins aren’t crossed over the horse’s neck, dropping a rein means it will fall to the ground.
When riding a younger horse, you’ll keep your hands wide, and Ben says you’ll work to get your hands closer and closer to each other and the horse’s neck throughout the months of training in preparation for the transition to a curb bit and riding one-handed.
You’ll primarily use a direct rein, asking the horse to turn toward your pull on one rein or the other.
You can also use the reins to neck rein, laying one rein across your horse’s neck to ask him to move away from that pressure. Horses have to be taught to neck rein, but that process starts with riding two-handed in a snaffle.
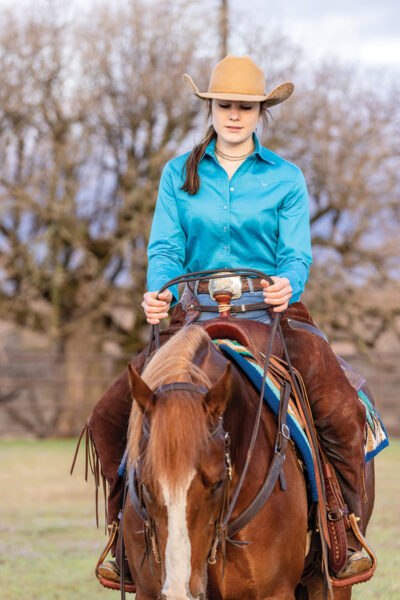
One-handed: The hand you hold your reins in is personal preference. Ben says if you’re not planning to learn how to rope, use your dominant hand. For most riders, that will be your right hand. If you are wanting to rope, you’ll probably hold the reins in your non-dominant hand.
While exact hand position can vary by class, in general, Ben says you’ll want to have your index finger between the reins, and the tails of your reins coming out of the bottom (heel) of your hand.
“When you’re showing, that is the only hand allowed to touch the reins from your hand to the horse’s bit,” Ben says. “You can adjust the reins behind your hand to untwist the slack, but check with your association to see if you can do that while moving, or if you need to be standing still.”
While riding one-handed, the only directional cues you’ll give are by neck reining. If you’re at home, you may reach down and pull on the reins with your free hand for a follow-up direct rein cue, but that is not allowed in competition.
Practice, Practice!
Keeping your reins the same length is the most challenging part of riding with split reins, particularly when you’re riding one-handed. While you’re learning to use split reins, Ben suggests putting a piece of black or brown electrical tape 3½ to 4 feet down the length of the rein on both reins so you can feel where your hand needs to be. This is especially helpful in competition.

Proficiency in using split reins depends on practice and muscle memory. Ben suggests practicing with a set of reins while sitting in a chair. Tie them together and loop the bit ends around your foot or hang up a bridle in front of you. Hold the reins as you would in the saddle.
“Pick up your left hand like you were going to stop your horse, and you can practice adjusting your reins to either loosen them or shorten them, all while using one hand,” Ben says. “The more practice you get, the more dexterity you’ll have in your fingers, and the easier it’s going to be for you.”
Recovering a Dropped Rein
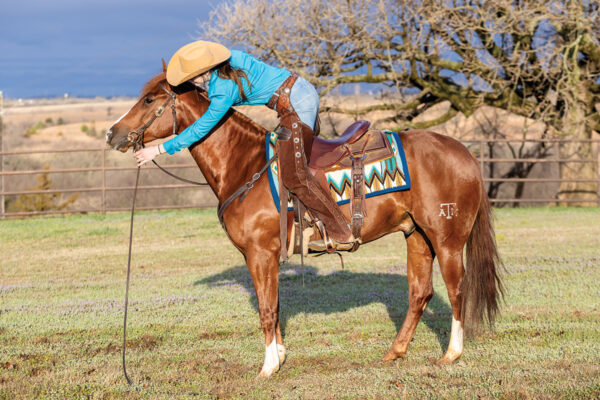
You may drop a rein at some point while riding in split reins, but no need to panic. If your horse is moving slowly or has stopped, you can lean forward and reach for the dropped rein. If your horse is moving faster, it’s a bit trickier.
“You’ll want to do a one-rein stop, pulling back on your one rein until your horse stands still, then dismount and pick up your rein,” says trainer Ben Baldus. “Practice the one-rein stop at a time when you have both reins, so you both know the cues.”
Learn More
The rules for using reins vary by association and by class. Check your association’s rulebook for guidelines on the way you can hold and use your reins. The latest versions of rulebooks from the American Quarter Horse Association, American Paint Horse Association, National Reining Horse Association and other organizations are all available for free online.
Meet the Trainer
Ben Baldus is a reining, reined cow horse and ranch versatility trainer located in Pilot Point, Texas, with his wife, Cameron. He has trained horses for competition in the National Reining Horse Association, National Reined Cow Horse Association, and American Quarter Horse Association. He is a three-time AQHA World Champion in Ranch Versatility, NRCHA World Champion Limited Open Hackamore and NRCHA Reserve World Champion Open Two-Rein, as well as a finalist at the NRHA and NRCHA futurities.
This article about how to use split reins appeared in the July/August 2022 issue of Young Rider magazine. Click here to subscribe!