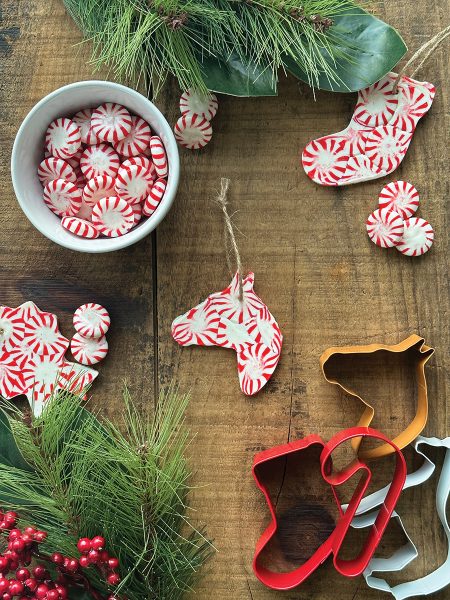
‘Tis the season to decorate and celebrate! This adorable DIY is a two-in-one. Hang these peppermint ornaments on your tree (make sure to create new ones each year—these are only good for one season), or decorate your horse’s stall with them, since they also double as yummy horse treats! Get started on making these DIY horse peppermint ornaments (or treats) in time for the holidays.
This recipe contains horse-safe ingredients, but speak with your veterinarian first if your horse has any health concerns.
Materials
◆ Metal cookie cutters
◆ Cookie sheet
◆ Peppermint candies
◆ Parchment paper
◆ Cooking spray
◆ Toothpick
◆ Twine
Instructions
Step 1: Preheat oven to 350° F.
Step 2: Line each cookie sheet with parchment paper or a silicone baking mat.
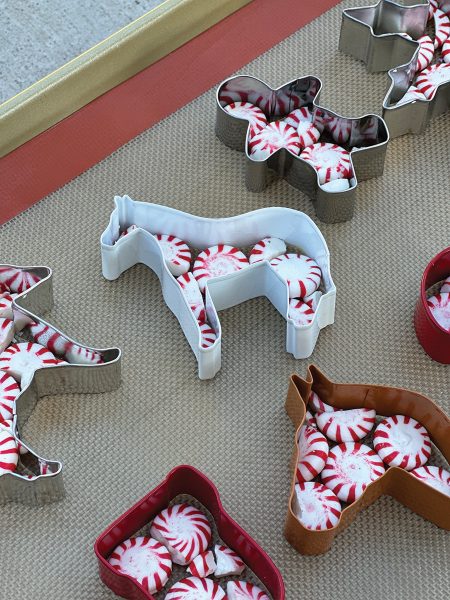
Step 3: Spray each cookie cutter with cooking spray and place on the baking sheet. Make sure you are using metal cookie cutters and they are spread out.
Step 4: Place a single layer of peppermint candies inside each of your cookie cutters. Don’t overlap! You may need to ask an adult to help you cut some peppermints in half to fill your shapes.
Step 5: Place in the oven until all the gaps close (about 5-8 minutes). Remove before candies start to bubble.
Step 6: Remove from oven and let sit for 2 minutes (no more, no less—this is important!).
Step 7: Spray the end of a toothpick with cooking spray and poke a hole for the twine. You may need to move your toothpick in a circle to create a large enough hole.
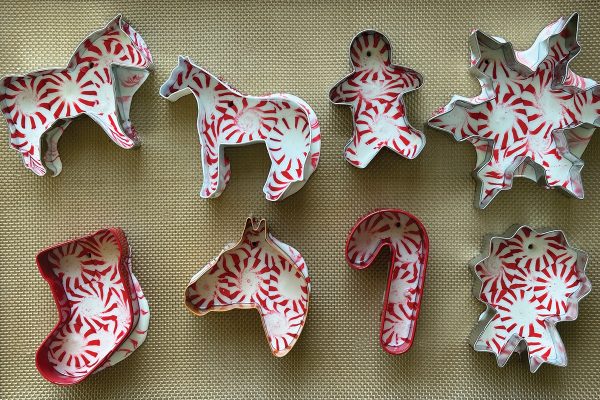
Step 8: Let sit for 10-15 minutes until they are not too hot to touch, but not completely cool, or they will crack. Gently push shapes out of the cookie cutters. Do not pull the cookie cutters apart, as the shapes may split from the pressure.
Step 9: Once completely cooled, add twine to your ornament/treat so you can hang on a tree or stall.
This article about DIY horse ornaments appeared in the November/December 2024 issue of Young Rider magazine. Click here to subscribe!